
One of the great things about the PetSafe brand is that no matter what type of fence you choose (wired, wireless, or remote), you can connect multiple collars to the system.
Although there are a few extra steps depending on the system you have, if you have multiple dogs, the PetSafe system will work for all of them.
If you’re wondering, “how do I connect another PetSafe collar?”, you’re in luck!
Connecting an additional PetSafe collar is as easy as pressing and holding down the mode button on the receiver collar.
Let’s take a look at each of these types of fences and how you can add additional collars to all of them.
Adding a Second Collar
All of the PetSafe containment systems come with 1 receiver collar.
If you have multiple dogs, you can add as many extra collars as you need but you will need to purchase any additional collars separately.
Depending on which kind of fence you have, additional receiver collars range from $119 to $160 and can be purchased at many retailers, as well as on the PetSafe website.
But before you buy another collar, make sure it is compatible with your current fence.
For example, a wired fence receiver collar will not work with a wireless fence.
Connecting to Wired Fences
Here are a few specific steps to follow to add an additional PetSafe collar to your wired fence:
- Make sure your new receiver collar has a battery in it or is fully charged if you have purchased a rechargeable battery.
- Turn your fence transmitter on.
- Standing next to your fence transmitter, turn on your receiver collar by pressing and holding the mode button. Once on, a blinking green light will alert you that it is now connected.
- Make sure you test the receiver collar at the fence boundary before placing it on your dog.
Connecting to Wireless Fences
PetSafe wireless fences have a different process for adding another collar:
- Remove the battery from your receiver collar (if there is already one in there) and hold the correction level button down until it is no longer flashing.
- Set the boundary switch on the transmitter to “high” and slowly turn the boundary control signal from “8,” down to “1,” and then back up finally to “4.”
- Standing next to the transmitter, re-insert the battery into the receiver collar. It should now be connected.
- Test out the collar before setting your desired boundary level on the transmitter.
Keep in mind that you will need to follow this process every time you change a battery in wireless fence collars.
Read More: Where Should PetSafe Wireless Fence Be Placed? Get the most out of your wireless system using our guide!
Connecting to Remote Fences
PetSafe also has a remote fence. Here’s how to connect additional collars to your remote:
- Set the remote to two-dog mode.
- Press and hold the power button on the receiver collar until the light begins flashing and the collar begins beeping.
- Press and hold the yellow button on the remote until it begins flashing. Your system should now be paired.
- Always test before using it with your dog.
PetSafe Remote Not Working
When you attempt to connect a second collar to your remote fence, you may find that the remote doesn’t seem to be working.
If that happens, there are a few steps you can take to troubleshoot the problem:
- Check that both the remote and the collar have fully-charged batteries. On the remote, you will see a battery life indicator near the bottom of the screen. On the collar, a red light will indicate low battery life.
- Fully charge both the collar and the remote before attempting to pair the collar again.
- If the remote still does not work, contact a customer service representative for PetSafe who will be able to direct you further.
Read our related article, Why is My Invisible Fence Collar Blinking Red? We cover what it means when your dog’s collar is blinking and how to fix it!
PetSafe Collar Instructions

After officially adding a second collar to your PetSafe fence system, there are just a few steps left to make sure your new collar can operate safely for your pup.
Test the New Collar
Before beginning training with your pup, you should test a newly-connected receiver collar.
Here are the steps to follow:
- Take the collar off your dog. It is never safe to test the collar while your dog is wearing it.
- Hold the collar at the height of your dog, and walk towards the boundary line.
- As you approach the boundary line, the receiver collar should issue a warning beep and a static shock as you cross the boundary.
- Check the boundary at multiple spots in the yard to ensure that the entire fence is functioning properly with no signal interruptions
If you follow these steps, and your new receiver collar does not seem to be working, try taking out the battery and then reconnecting your collar.
Read our related article on How to Test Invisible Fence Collar Battery. This guide covers testing your collar in-depth if you need more help!
Setting Shock Levels
When you add a second collar, you will be able to set unique static levels for each collar.
PetSafe works on a shocking scale of 1 to 6, with 1 being the smallest shock and 6 being the largest.
This is a great feature if you have dogs with different temperaments.
For example, if one dog is timid and quiet, it will need a much lower setting than a dog who is hyper, excitable, or stubborn.
Here are a few steps to set the shock level on each collar:
- Check the receiver light indicator on the collar by pressing the correction level button.
- Watch for the flashes. A red light will flash to represent what level the collar is currently on. For example, if it’s on level two, the light will blink twice.
- Increase the level by pressing the correction level button immediately after checking the current level.
- If you want to decrease the level, press the button again after reaching level six to return back to level one.
Check out this video for more information about setting static shock levels:
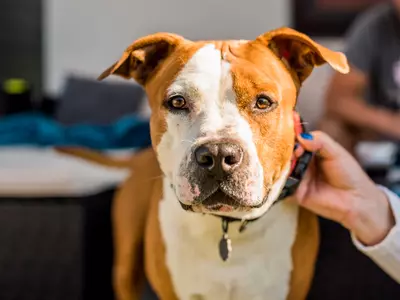
Fitting the Receiver Collar
To ensure the collar does its job properly and that your dog is comfortable in it, you need to make sure the collar fits your dog well.
Here is how to fit this collar on your dog:
- While your dog is standing, fit the collar around their neck, with the prongs snug against your dog’s neck underneath their chin.
- You should be able to stick 2 fingers between the collar and your dog’s neck.
The prongs will be able to deliver the shocks, but make sure it is not so tight that it cuts off your dog’s airway or makes them uncomfortable.
- Make sure the prongs are resting against your dog’s neck.
If your pup has a very thick coat, you may need to trim it down a bit so that the hair doesn’t insulate the skin from the prongs.
- Recheck the fit after they have been wearing it a while to make sure it didn’t loosen up.
Training
After connecting and testing the collar, setting the correct boundaries and shocks, and fitting the collar on your dog’s neck, it’s time to learn how to train your dog with an invisible fence!
Remember, keep training sessions short (no more than 20 minutes) and reward your dog with lots of praise when they respond appropriately to the warning beeps or shocks.
Additionally, use dog training flags to mark out the boundary while your dog is learning how to play safely with the fence on.
This will be a visual reminder for him in addition to the collar’s warnings.
Yard Expansions
If you are buying an additional PetSafe collar for another dog in your backyard, you also may want to expand your yard to give both dogs more room to play.
With wired fences, you will need to invest in additional wires to lay down and connect to your current system.
However, if you have a wireless or a remote system, expanding your yard is very easy.
Just simply turn up the boundary distance on the transmitter or remote control.
With a wireless system, if you are looking to double the size of your yard, you can also purchase an additional transmitter and connect the two transmitters together.
As long as the two transmitter areas overlap, your dogs’ receiver collars will treat them as one zone, giving them ample room to run and play around your yard.
Check out our related article on Invisible Fence Expanding for more details on increasing your dogs’ play space!
What Else Should I Know about PetSafe Collars?
The PetSafe manual has several recommendations for receiver collars.
First, DO NOT leave your dog’s receiver collar on him for more than 12 hours per day.
This will help avoid rashes or sores that could occur on your dog’s neck from wearing a heavy-duty collar.
Second, always use a separate collar for a leash as the receiver collars are not designed in a way that you can safely attach a leash.
Finally, although you cannot put the collar in any kind of washer, make a habit of wiping it down once a week to keep the collar clean.
Conclusion
PetSafe makes it very easy to connect multiple collars to their fence systems.
Whether you have a wired system, a wireless fence, or a remote fence, you will easily be able to add another collar, and another dog, to your backyard and keep all your dogs safe.
